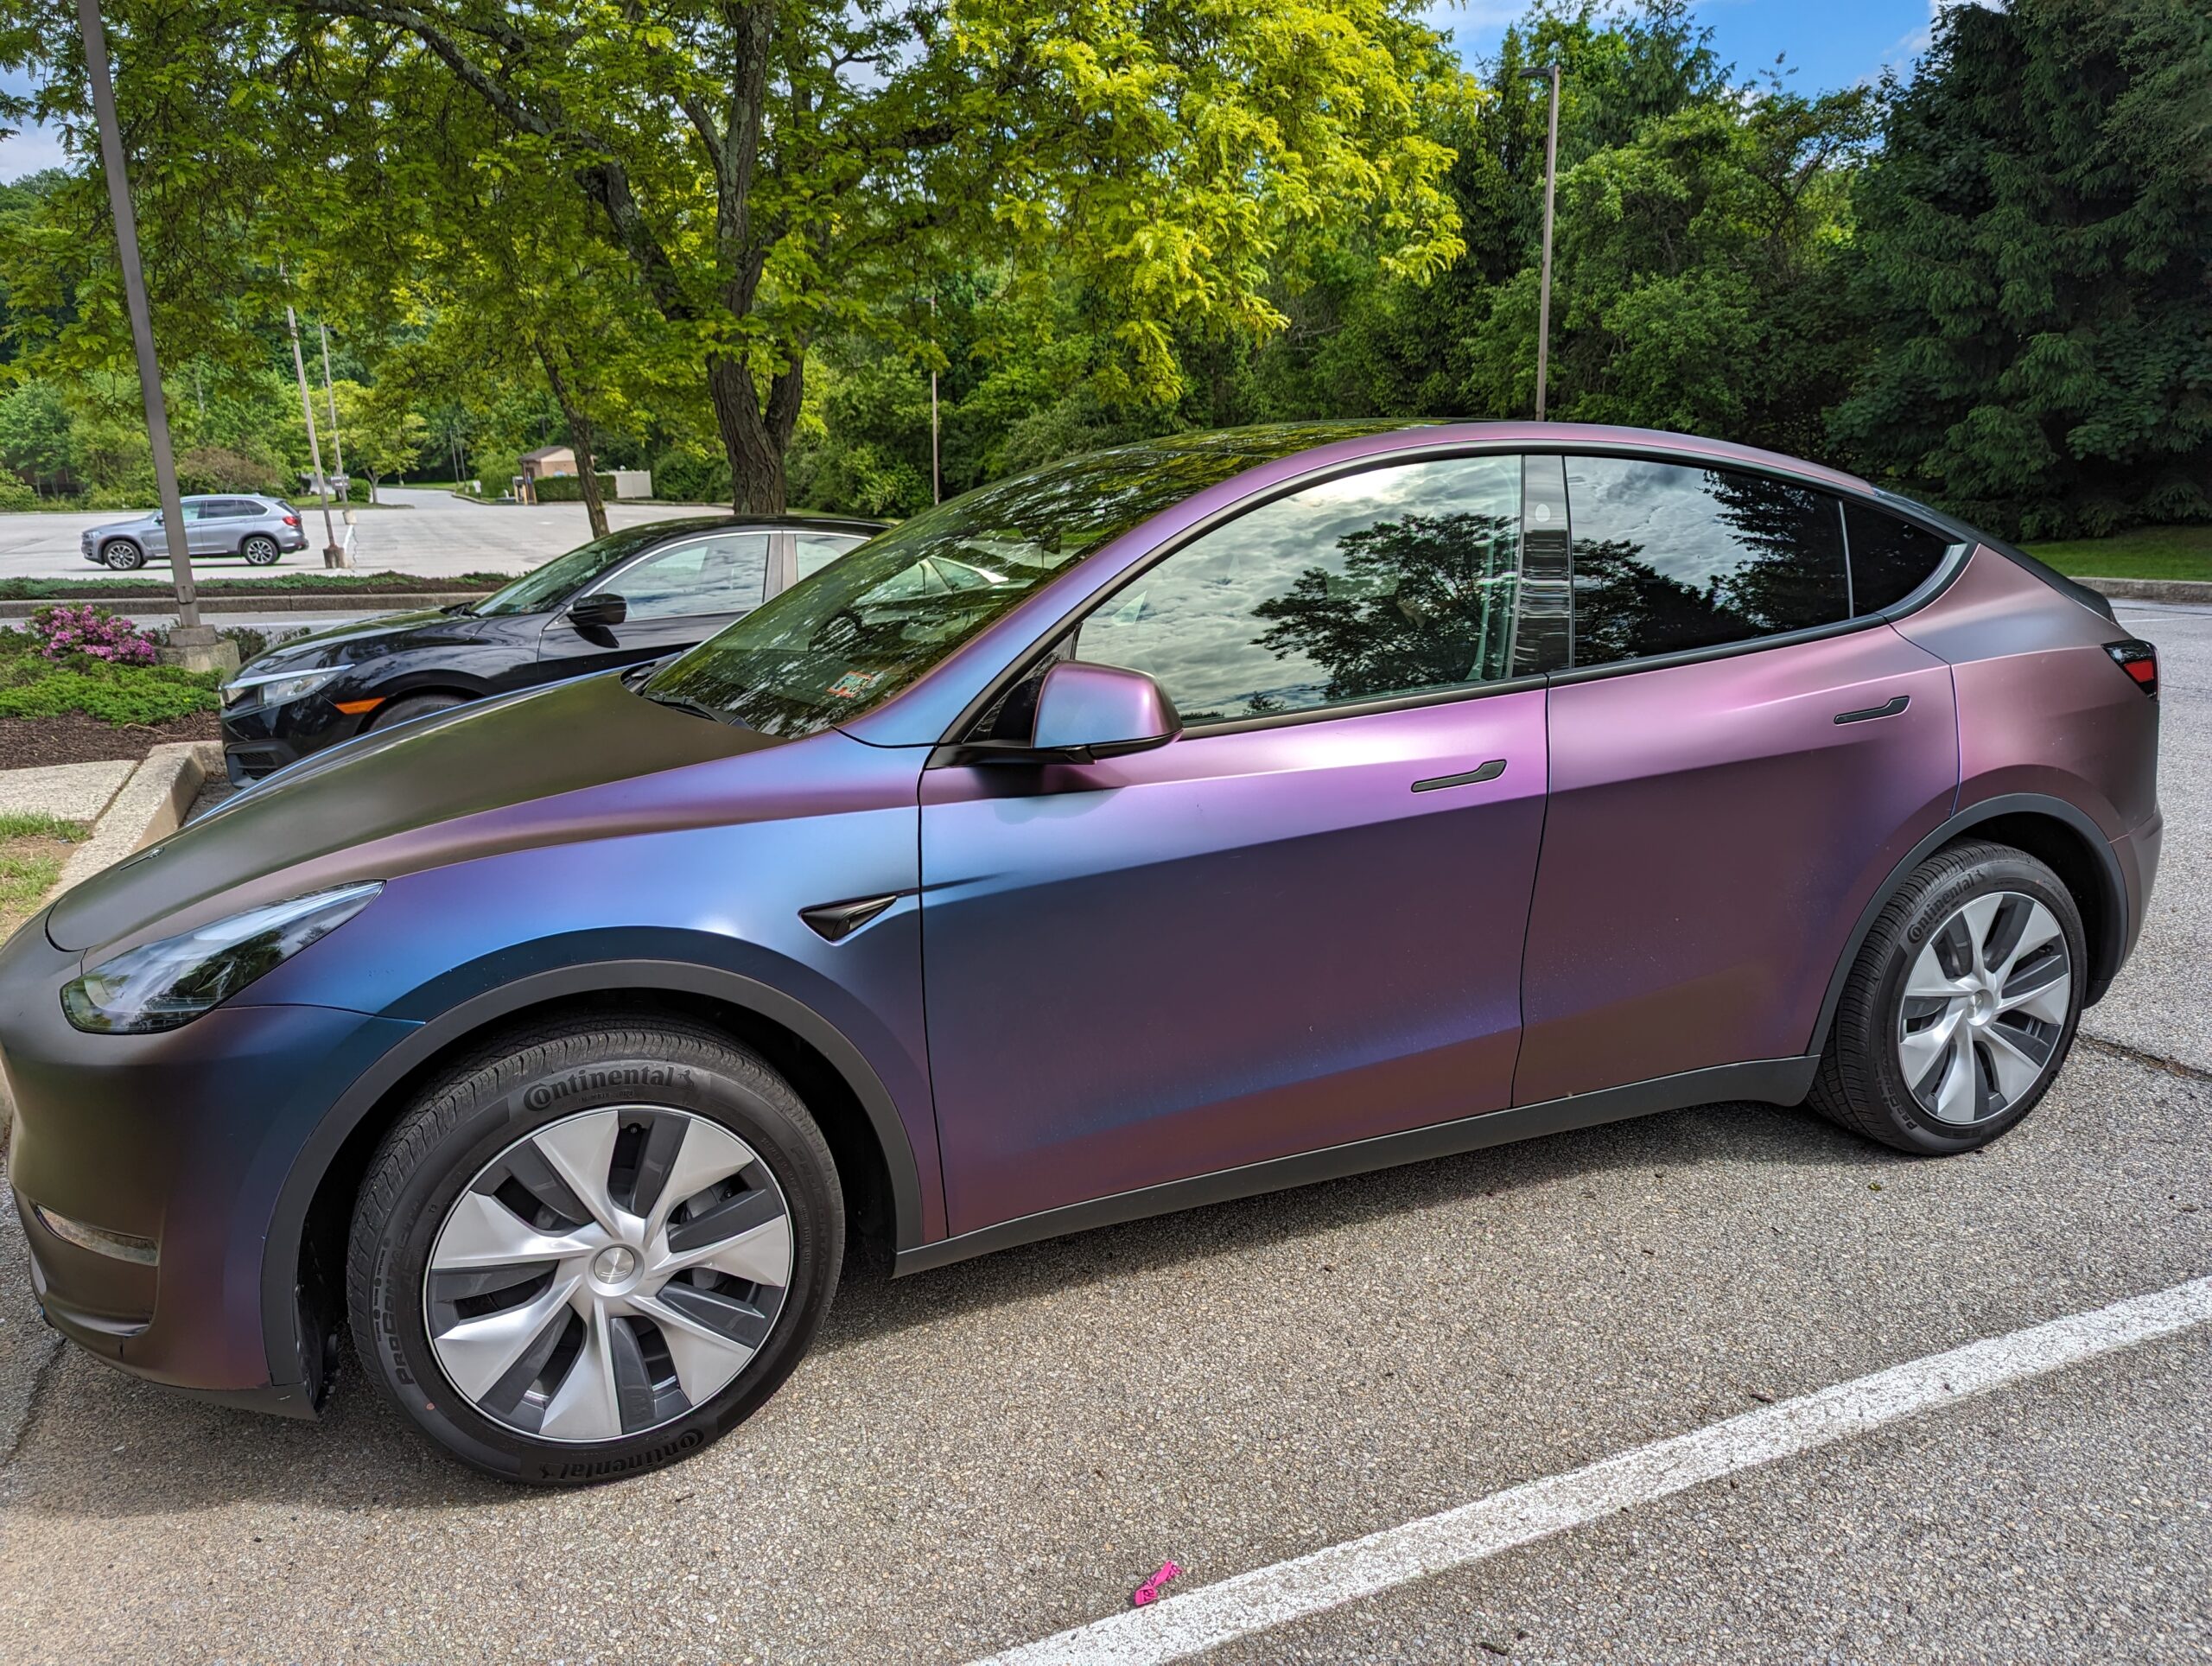
The wife needed a new car. I wanted to get an EV but she didn’t like the color of any of them. Then she saw a purple Tesla and immediately we knew the path we were headed. Many people don’t know this but when you see a car with an unusual color it is possibly a wrap. A vinyl wrap is a affordable way to dramatically change the look of your car without making the change permanent. So we ordered a Tesla Model Y and while we waited for it to be delivered we did some research. We got quotes to get the wrap done professionally between $3000 and $7000. So, of course, we decided that we would try to do it ourselves for a fraction of the cost. We searched through all the different wrap options, and there are a bunch! She finally settled on on a matte color changing purple called Avery Dennison SW900 – ColorFlow Satin Rushing Riptide. We purchased the vinyl for about $1000 from www.rvinyl.com. They had the best price and shipping was quick.
The next thing we did was a ton of research. We watched several youtube channels including CK Wraps and Paradox the Wrapper. They both provided a great starting point. When we purchased the vinyl, the web site provided us with a trial subscription to “The Wrap Institute” They had videos with exact instructions for wrapping a model Y. Each video went over one part of the car. It was perfect to watch as we got to each piece.
Those are great resources, but experts often forget what it’s like to be a complete beginner. Here are some tips I learned:
- Buy the Tools: We bought a kit from Amazon that included typical tools for wrapping a car. We used every tool a lot, especially the tuck tool. I’m not sure we could have done the job without them.
- Patience is Key: Go slow and be careful. Rushing will lead to mistakes. Having two people work together was essential for us. Some large parts can’t be done alone, and without two of us to keep the vinyl stretched, it would stick to itself and become difficult to work with.
- Stretching the Vinyl: The vinyl stretches, which is key to getting a smooth finish. However, there’s a balance: overstretching will cause it to pull back, while understretching will leave air bubbles that are difficult to remove without causing wrinkles.
- Work in a Clean Environment: Dirt on the car or vinyl during installation will show through, so keep your workspace clean.
- Handling Hard Curves: For pieces with lots of hard curves, like bumpers, it’s okay to use more than one piece. You can hide seams on the angles.
- Using Knifeless Tape: All the pros use knifeless tape to cut the vinyl on the car. We struggled with this, finding it difficult to get the line out of the tape and to cut the vinyl cleanly. We mostly got the hang of it by the end, but it wasn’t as easy as it looks.
We are pretty happy with how it came out but there are definitely mistakes. Most people won’t notice and certainly no one in another can see the mistakes. You have to be pretty close to pick them up. In the end it took about 15 hours for two of us to wrap the whole car. We saved thousands of dollars and learned something new. It was actually pretty hard to do but the results make if worth it. Everyone comments on it and even though I know some people think we are crazy most people think it is pretty cool.
Check out this time lapse of the passenger door panel vinyl instal. https://youtu.be/NpKT4AUxlFU


Leave a Reply